
Howdee! I am natalie’s tiny baby sister who is dipping her pinky toe into the blogging world. I’ve debated starting my own blog as it seems to be a “setzler-woman right of passage” but I cant bring myself to do it just yet. In time…
However, Natalie has asked for me to do a guest-blog post and I will happily oblige!
After our wedding in September, husband and I moved to the quaint city of Houston Texas. In case you were wondering- I read somewhere that Alabama’s population is 4.7 million. The population of greater Houston you ask? 5.6 MILLION PEOPLE. In one single city. Where we live.

To say we are teeny tiny fish in a big pond is an understatement. But we are loving it out here, and being that our whole reason of coming out here was job opportunities, I must say that Houston is holding up her end of the deal.
We were lucky to find a great affordable 2 bedroom apartment in the memorial area (I think that’s what it’s called??) with shady trees and closets as big as a bedroom.
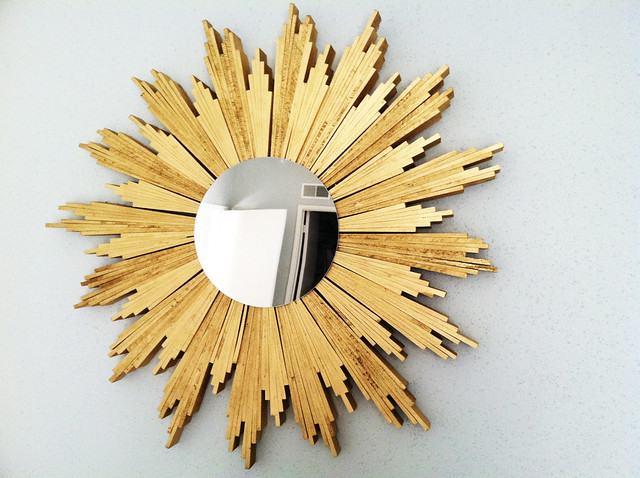
Decorating our mid 1970’s apartment on a newlyweds-so-lets-not-spend-money-on-things-right-now type of budget has not been the easiest. However, thanks to some frugal purchases, the place is slowly coming together. The newest piece to join our home is a 33” sunburst mirror.
I first saw THIS sunburst mirror on Pinterest and loved its irregular yet symmetrical rays. There are dozens of shim-made mirror tutorials on pinterest (here: http://westermanfam.blogspot.com/2011/05/sunburst-mirror-diy.html, here: http://thecraftingchicks.com/2011/09/diy-sunburst-mirror.html, and here: http://blog.addicted2decorating.com/2011/03/diy-sunburst-mirror-finished.html) but once I saw this one, I knew it had to be mine. Plus, all the components could be found at Lowe’s and Michaels!
I followed the directions pretty closely, but with some variance.
Here’s what you will need:
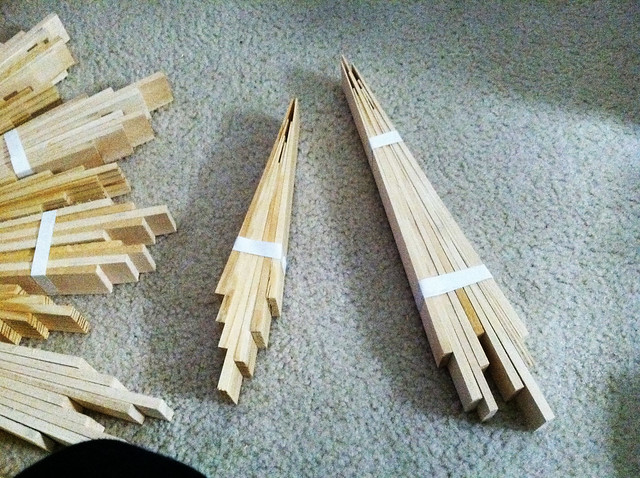
- 2 different sizes of wood shims (found in the door/window aisle at Lowes) I used 4 packs of 42 count, 12" long shims, and 8 packs of 14 count, 8" long shims
- Elmer's Wood Glue (8 oz)
- Gorilla glue
- 10” round mirror from Michaels
- spray paint in desired color (I used Rust-Oleum Gold Metallic Finish. It is the perfect metallic gold, and does a nice coat)
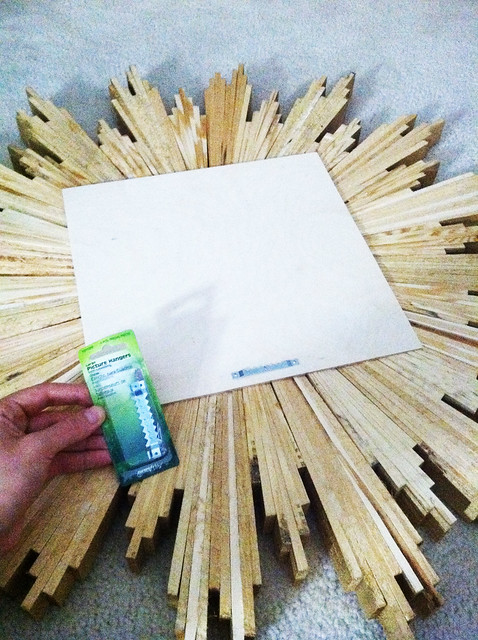
- thin plywood sheet for backing (I used a 12"x12" sheet from Michaels)
- Picture hanging hardware
1. begin by grouping the shims into clusters. I liked the arrangement of my inspired-by piece and went with something similar – groupings of 9 longer shims and 7 shorter shims. I did the groupings pretty randomly because I lack patience, but tried to keep them similar as to create a more uniform appearance. Once you have the right look, begin gluing the shims together using the elmer’s wood glue. I reinforced my groupings with some craft tape so that the glue would dry without me having to hold the pieces together.

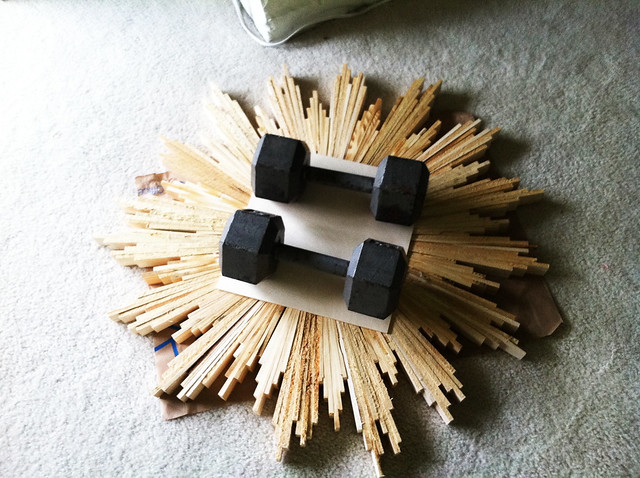
2. begin laying the “rays” onto the plywood sheet to start your sunburst. I ended up making 16 groupings of each size. I let the glue on the rays dry overnight since it was late and I was tired of sitting on the floor.


(getting a visual)
3. when the “rays” are dry, remove the tape and begin gluing them together into the sunburst shape you created using the wood glue. This was a little difficult to do since the sides of the shims aren’t perfectly smooth and I had to go slow (argh) and hold the pieces together as I went. The tutorial I read had to use some individual shims to fill some gaps between the groupings, but mine fit together close enough that this wasn’t necessary for me. Let the glue dry for at least two hours before moving forward (or overnight since it’s late again, and you want to go to bed)
4. now, take the plywood backer and squeeze some gorilla glue on it. I came to find that my gorilla glue from college had become hard as a rock. Did you know that according to the gorilla glue website you can put the bottle into a bowl of hot water and it will soften back to normal?
5. Panic. This did not work. WHY??!! I have two ¾ full bottles of gorilla glue and can’t use either!?! What the Hades this is annoying. Argh.
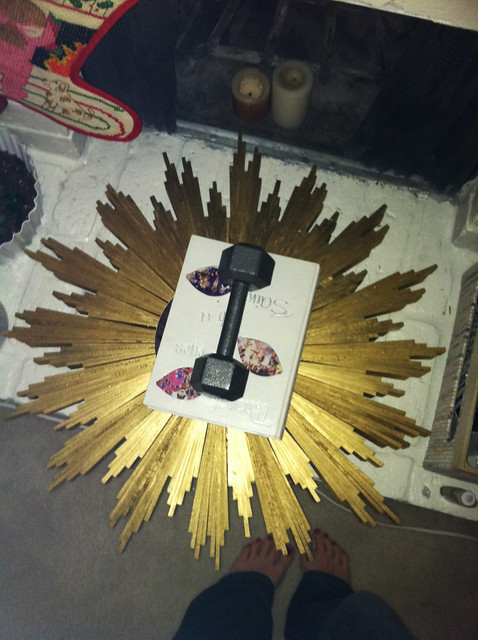
6. drive to lowes and spend 6 bucks on some new gorilla glue. Squirt a ton of it onto the plywood backer. Center the sunburst onto the plywood, then weigh it down with something and let it dry for several hours. (Note – don’t worry if your mirror feels flimsy at this point. Once the gorilla glue on both sides hardens, the mirror will become rigid and strong)
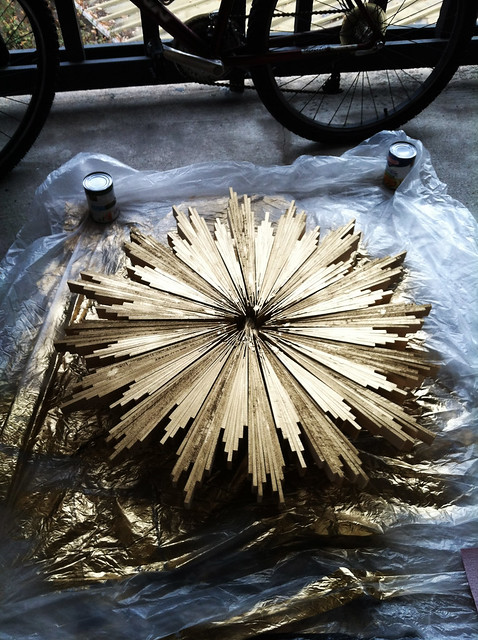
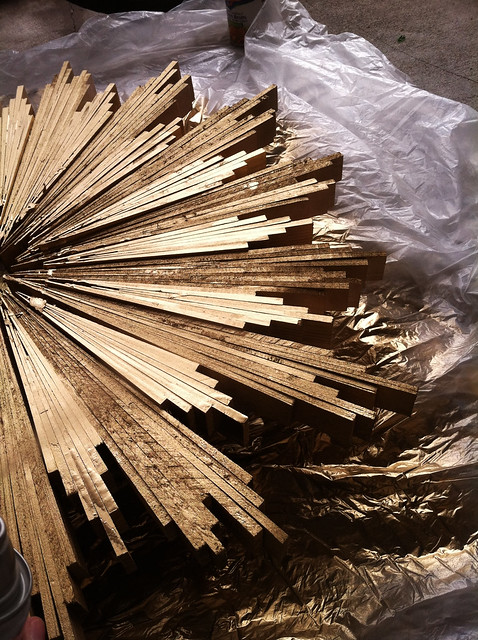
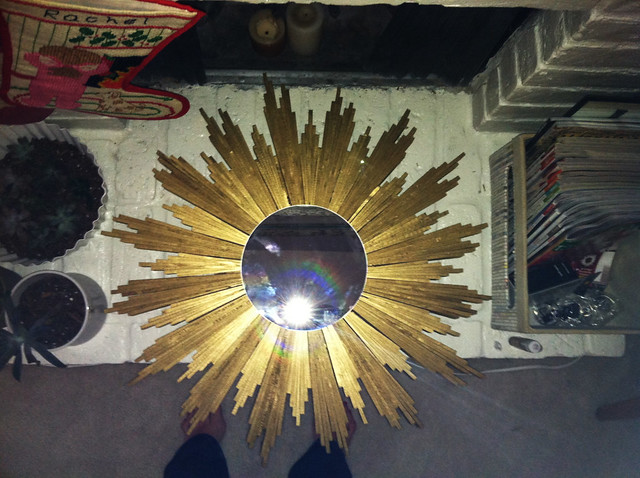
7. next, I took my sunburst outside onto our porch and laid it on top of a tarp to begin the spraying process. Tip – used canned goods to raise the item off the ground. Works wonders. The tutorial I read primed her mirror first. But I didn’t want to buy more paint and I am lazy and impatient so I skipped this step. Once you have spray painted, let it dry for a couple more hours.
8. after the paint dries, you want to squeeze gorilla glue onto the back of the mirror, then place the mirror on the center of the burst (covering the area where the shims come together), and weigh it down with something heavy. Make sure you don’t use too much gorilla glue because it will foam and spread and you don’t want it to come peaking out the sides of the mirror…or for it to accidentally seep through and glue your whole mirror to your rented-apartment’s carpet floor. Not that I speak from experience or anything. But it may be wise to keep some scissors handy…
9. Then secure some type of hanging hardware onto the plywood backer and VOILA! (I used a tooth-style piece with bigger nails than what came in the package. The teeny microscopic nails that come with the tooth picture hangers are a joke)
The finished product:
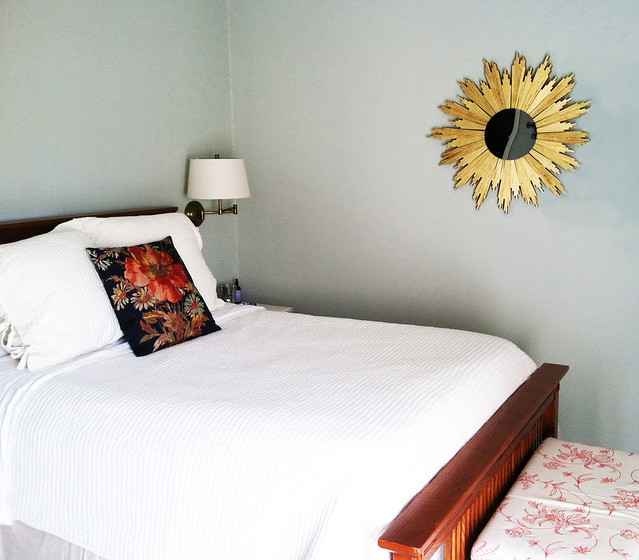
(I currently have the mirror hanging on this long wall in our bedroom…)
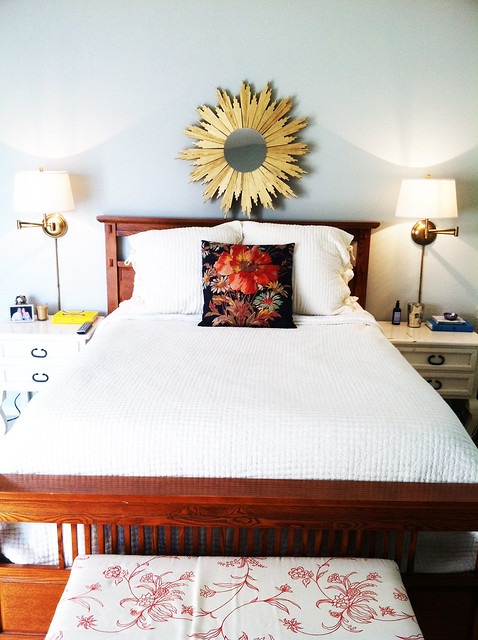
(…but I may just get the sweet husband to hang it over our bed. And yes, as you can tell by our bedside books, we are both reading the Girl with the Dragon Tattoo series. If you aren’t already reading them, START. NOW. Soooo good)
My total after taxes came to $49.30. I don’t think you can buy a sunburst mirror for that cheap anywhere! While it took a little bit of time to make, it was well worth it and really makes our room feel a little more like home :)
Enjoy!
thanks rachel! see doesn't she need a blog? well, i think she does. it sure would be nice to keep up with her more than phone calls. ill be back with some more posts on my house, a job (the camp) update, and a much needed update on mi bebe número tres. (how many languages did i just butcher?)
happy weekend!
(sorry if formatting is off at all. posting this from my iPad and can't do normal "things" on it but wanted to get this fabulous DIY posted sooner than later!)
xoxo
1.20.2012
Guest post: Rachel makes a mirror
Subscribe to:
Post Comments (Atom)

Great blog burbie!!!!
ReplyDeleteRachel, I am buying you the bumper sticker that says, "I wasn't born in Texas, but I got here as fast as I could." :) I always tell Justin I'm going to buy one for him. Haha! So glad ya'll are loving H-town ... it's definitely an overwhelming city, and I never mastered the roads even after living there for 18 years. I'll let you know when we're in town next and we can have dinner! xoxo
ReplyDeleteps. I am very impressed by your craftiness!
Hi Rachel! It was great to hear from you--even if only by blog! You DO need your own! Love the finished product! Thanks Nat for having her! Can't wait for your upcoming ones either (not prejudiced or anything,but ESPECIALLY those ones featuring Roe babies!) :-)Love ya'll, La
ReplyDeleteYAY RACHIE!!!
ReplyDeletesomeone needs a blog... i'm just saying..... you are a great writer, you are witty, extremely creative, and the world needs to hear about it. PLUS i miss you living so far far away so we need to hear what you are up to. LOVE your mirror.... please blog more :)
This was a fabulous idea! I knew all about the mirror project, but now I 'understand' how it was made.
ReplyDeleteAnd this little post CONFIRMS my suspicions, and that is....Rach, you have GOT to start a blog. We want to know!!!
Nat, can't wait for your updates on all the babes and projects :)
I think you might need a blog of your own...Love your mirror...I must get to pinterest. So glad you have settled into you new home. Love you, aunt elizabeth
ReplyDeleteRachel- welcome to Houston! I love reading your sister's blog (I can't remember how I initially stumbled on it - maybe one of my Baylor friends?!?!) We live in the Memorial area and love it! If you haven't gone to MAI go now- it is an interior designer's heaven! http://www.maihouston.com/
ReplyDeleteYou will love it! LOVE LOVE LOVE your mirror~ Want one for my house.
You better send this to Jenny at The Little Green Notebook! She loves posting clever diy's.
ReplyDeleteWhat patience.
pve
Found your tutorial via The Little Green Notebook. This is fantastic! I think I just found my weekend project. Thanks for sharing!
ReplyDeleteYeh, somebody actually listened to me.....loved spotting your mirror Rachel on little green notebook!
ReplyDeleteWoo hoo.
pve
Wow! that is one awesome shim mirror- and totally puts mine to shame. Welcome to the neighborhood Rachel!! Im in Houston too!! and yes I agree with everyone else- you need a blog! come to the dark side ;-)
ReplyDeleteFound your tutorial via Little Green Notebook. What a great idea!!
ReplyDeletewow, hats off for this creative work..
ReplyDeleteAbsolutely stunning job!! Wow!! It feels so good to see that there are so many creative people in this world!
ReplyDelete